 Fans
Fans
 Wires
Wires
 Lighting
 Switches and Accessories
 Water Heaters
 Switchgear
 Polycab Home Advisors
 Cables by Application
 Cables by Standards
 Cables by Type
 Renewables
 EPC
EPC Corporate
 News and Media
 Life at Polycab
 Contact Us
 Financial & Corporate Information
 Annual Reports
 Shareholder’s Information
 Credit Ratings
 Latest Updates
 Notices
 Corporate Governance
 Corporate Action History
 Investors Contacts
 Disclosures under Regulation 46
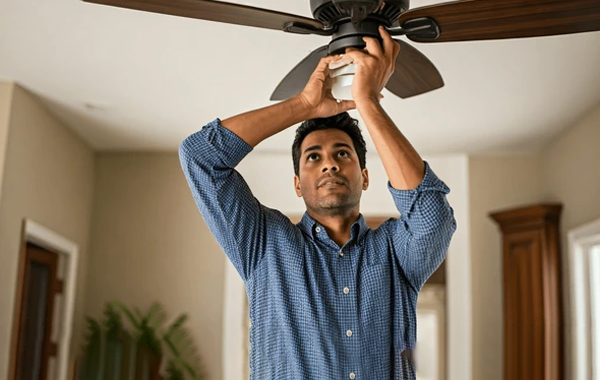
Ceiling fans are no longer just a cooling appliance; they have engraved a spot in millions of households as staples that are both visually pleasing and provide functional ventilation.
- February 19, 2025
- No comments yet
Tools and Materials Needed
Before you begin the ceiling fan installation, make sure you have all the necessary tools and materials, including:
-
Screwdrivers
-
Pliers
-
Wire cutters and strippers
-
Ladder or step stool
-
Circuit/voltage tester
-
Ceiling fan mounting kit (including a mounting bracket)
-
Wire nuts and electrical tape
-
Drill and drill bits (for installing the mounting bracket)
-
Ceiling fan kit (including blades, motor, and hardware)
-
Electrical safety kit
Step 1: Prepare the Installation Site
Before you jump into your “How to install a ceiling fan?” journey, it is important to consider safety precautions. Ensure that the electricity is turned off at the breaker box to prevent any electrical accidents. You can use a voltage tester on the ceiling wires to confirm that the power is indeed off.
Next, if replacing an old fan or light fixture, remove the existing installation and inspect the electrical box. It must be securely anchored and rated to hold a ceiling fan. If not, replace it with a fan-rated junction box and secure it properly to avoid any potential hazards.
Step 2: Assemble the Fan
-
Motor and Downrod Assembly: Attach the downrod to the fan motor by securing it with the provided pin and set screw. For fans with a longer downrod, thread the wires through the downrod first.
-
Blade Assembly: It is easier to attach the blades to the brackets before hanging the fan. So, secure each blade to its bracket using the provided screws, then attach the completed blade assemblies to the motor housing.
Step 3: Install the Mounting Bracket
Attach the mounting bracket to the ceiling box using screws. Make sure the bracket is firm and level, as it will support the full weight of the fan. For ceiling fans with LED lights or other designer fans, ensure the bracket does not interfere with the lighting assembly or decorative elements.
Step 4: Wire the Fan
With the fan motor securely mounted to the bracket, connect the fan's wires to the house wiring:
-
Connect like-coloured wires together: White to white (neutral), black to black (hot), and green to green or bare copper (ground). Use wire nuts to secure the connections and electrical tape to cover them for extra security.
-
Tuck the connected wires neatly into the ceiling box.
Step 5: Attach the Fan to the Bracket
Carefully lift the fan assembly and hang it on the hook of the mounting bracket, if available. This temporary support will allow you to make the electrical connections comfortably. Once wired, lift the fan and secure it to the mounting bracket using the provided screws and lock washers.
Step 6: Final Assembly
-
Install the Canopy: Lift the canopy up to the ceiling and secure it to the mounting bracket to conceal the wiring and hardware.
-
Install Light Fixtures: If your fan includes a light kit, assemble and attach it according to the manufacturer's instructions. Connect the light kit wires similarly to the fan wires.
Step 7: Test the Fan
Restore power at the breaker and test the fan with the wall switch or remote control. Check all the functions, such as fan speeds and light operation, to ensure everything is working correctly.
Additional Tips for Various Types of Ceiling Fans
When considering the addition of a ceiling fan to your home, it is important to recognise that not all fans are created equal. The type of ceiling fan you choose can significantly influence both the functionality and style of your space. Here are a few pointers to guide you in selecting the right fan type for your needs, ensuring optimal performance and aesthetic alignment with your home’s decor.
-
Consider the Types of Ceiling Fans: When selecting a ceiling fan with specific features like LED lights or remote controls, ensure you familiarise yourself with its functionalities. For fans with LED lights, explore adjustable brightness and colour temperature options to enhance ambiance. For those with remotes, learn all the settings available, such as speed adjustments and timer functions, to fully utilise the fan's capabilities.
-
Ceiling Height Considerations: The installation height of your ceiling fan can greatly affect its efficiency and safety. For rooms with high ceilings, you can opt for models that include a longer downrod to position the fan at an ideal height for optimal air circulation. Conversely, in rooms with low ceilings, a low-profile or flush-mount fan is recommended to ensure a safe clearance level, preventing any head bumps while maintaining efficient air flow.
-
Maintenance Requirements: To keep your ceiling fan in top condition, regular maintenance is crucial. This includes periodically dusting the blades to prevent buildup that can unbalance and slow the fan. Also, check the screws and blade fittings every few months to ensure they are secure, as vibrations from regular use can loosen connections over time. This will help maintain both the performance and longevity of your fan.
A Hassle-Free Guide for a Hassle-Free Installation
By following these detailed steps, you can ensure a safe and proper ceiling fan installation. Polycab’s range of ceiling fans offers something for every home, from energy-efficient models to stylish options that complement your decor. Whether you choose one of our modern designer fans or a practical model with LED lighting, you can enjoy improved air circulation and comfort in any room.
RECENT POSTS
- Where & How to Install LED Strip Lights for That Sleek, Modern Glow
- How to Use LED Strip Lights on Ceilings for a Modern Aesthetic
- 7 Bright Lighting Ideas to Refresh Your Living Space with Polycab LEDs
- 5 Things to Look for Before Selecting an Exhaust Fan for Your Home
- 5 Key Factors to Consider Before Buying Modular Switches and Sockets


